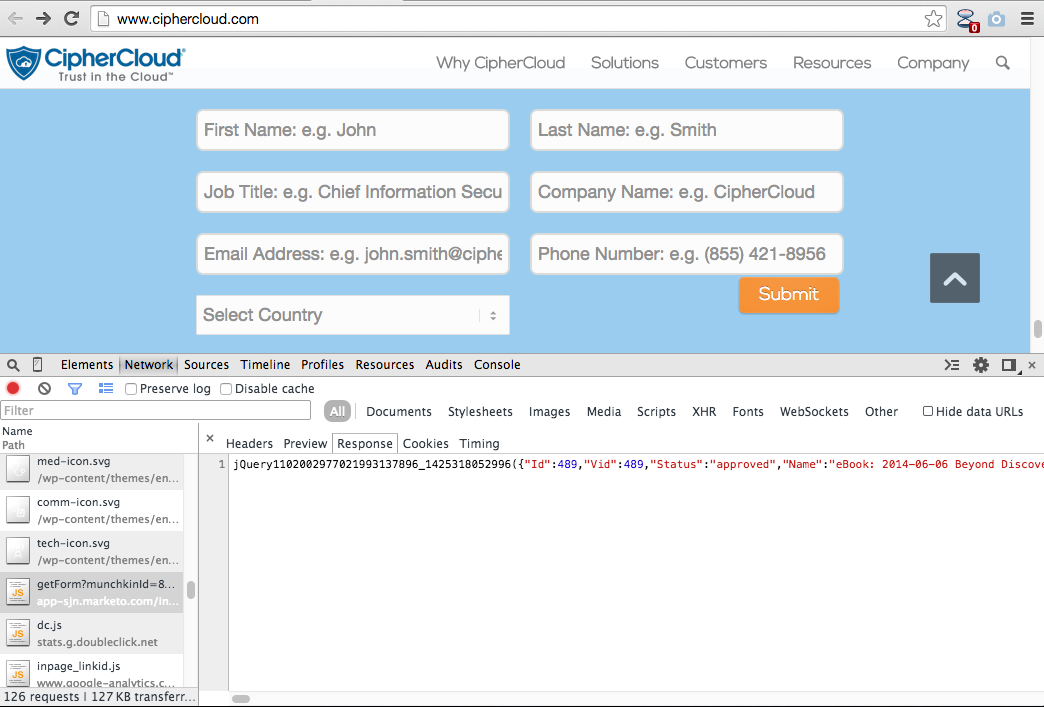
The content in green is from ciphercloud.com; in blue is the form from marketo.
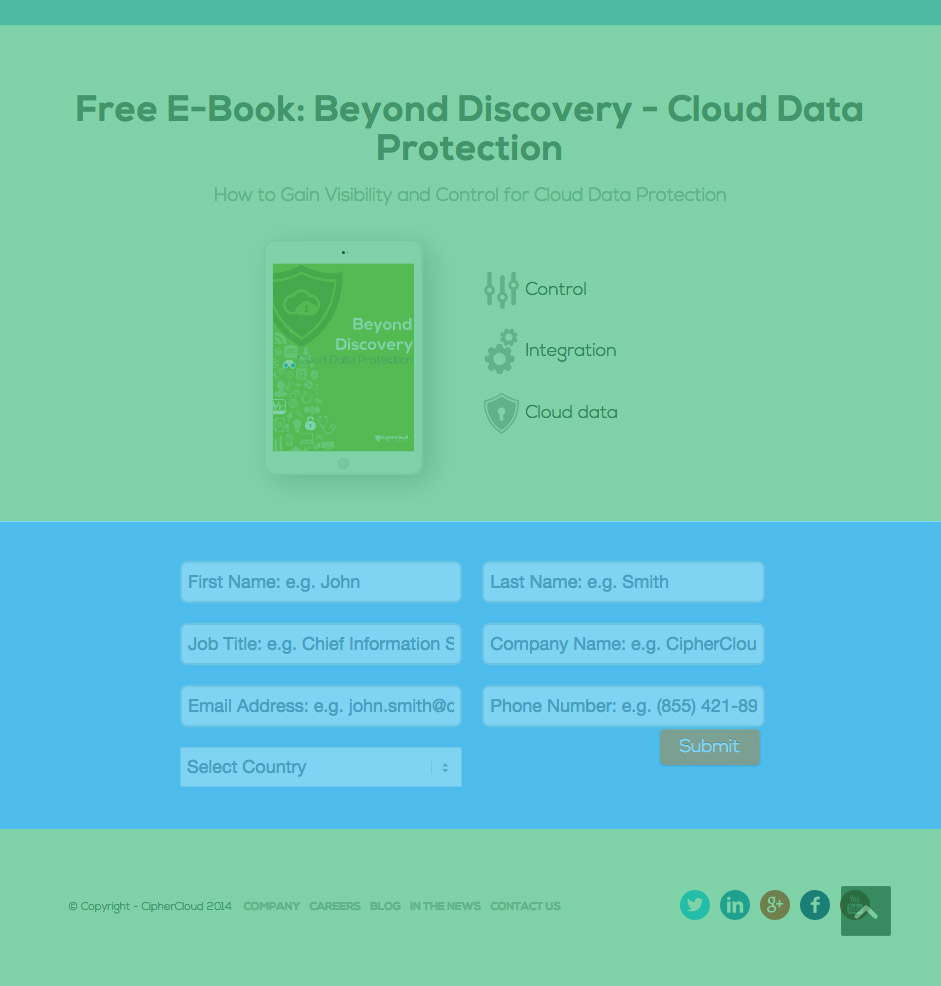
On this page, there is a form that gives the user a free e-book in exchange for their contact data. However, it is handled by a third-party product, using javascript code and pulling in JSON data from an external domain. In this example, the website with the form is ciphercloud.com while the form is handled by marketo.com.
The code for the form is below:
<script src="//app-sjn.marketo.com/js/forms2/js/forms2.js"></script>
[...]
<div id="form-container">
  <form id="mktoForm_489"></form>
</div>
[...]
<script type="text/javascript">
  document.write(unescape("%3Cscript src='//munchkin.marketo.net/munchkin.js' type='text/javascript'%3E%3C/script%3E"));
</script>
[...]
<script>Munchkin.init('830-ILB-474');</script>
[...]
<script>// <![CDATA[
MktoForms2.loadForm("//app-sjn.marketo.com", "830-ILB-474", 489);
// ]]></script>
Taking a look at the page with Chrome's Developer Tools, we'll see that the data for the form comes from the URL http://app-sjn.marketo.com/index.php/form/getForm?munchkinId=830-ILB-474&form=489&url=http%3A%2F%2Fwww.ciphercloud.com%2F&callback=jQuery110207256591254845262_1424970110347&_=1424970110348, which is pulled in via JSONP in form2.js.
To be able to translate this, we'll need to create a separate project in Easyling for the domain app-sjn.marketo.com, and then link the two projects together. The example project for ciphercloud.com is cf5x28tp, the project for marketo.com is i3pi3p0k.
Once you created a new project in Easyling, head to the JSON Path Tester tool in Dashboard -> Advanced Settings. Paste the URL from above, then click . You'll get something like this:
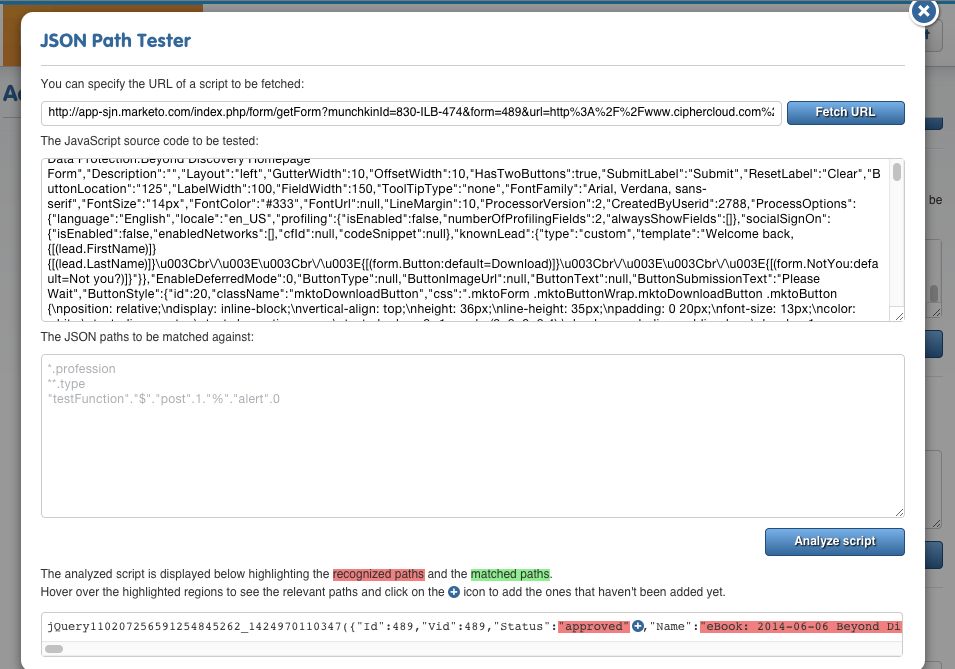
You can click the + button to add the string you would like to translate. You will have to replace the long jQuery110... string with just a *, because (due to JSONP) it will change between requests, depending on the callback query parameter. You can also use the * wherever you would like all elements of a JSON subtree translated; or ** to translate all children and sub-children nodes, but please note that the latter one comes with a serious performance penality.
The paths for translating the text is:
*.0."SubmitLabel"
*.0."ResetLabel"
*.0."ProcessOptions"."knownLead"."template"
*.0."ButtonSubmissionText"
*.0."rows".*.*."PlaceholderText"
*.0."rows".*.*."ValidationMessage"
*.0."rows".*.*."Description"
*.0."rows".*.*."FieldMask"
*.0."rows".3.0."PicklistValues".*."label"
*.0."rows".3.0."PicklistValues".*."value"
*.0."rows".3.1."VisibilityRule"."rules".*."picklistFilterValues".0."label"
*.0."rows".3.1."VisibilityRule"."rules".*."values".0
*.0."rows".3.1."VisibilityRule"."rules".*."altLabel"
*.0."rows".3.1."ValidationMessage"
Paste that into the JavaScript translation options (JSON / variables) section in Dashboard -> Advanced settings and click .
Don't leave the page just yet: because a different callback function name is generated every time, we'll tell Easyling to translate everything that starts with /index.php/form/getForm. You can add that further down the page at the section Mark multiple resources as translatable.
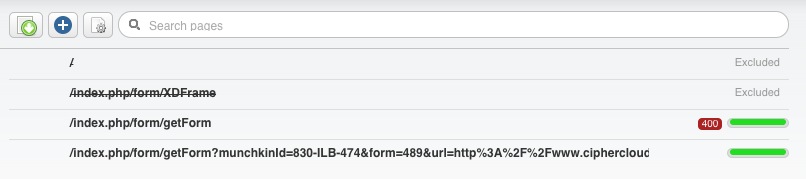
Now go to Content -> Pages, click the button and add the following pages manually:
/index.php/form/getForm
/index.php/form/getForm?munchkinId=830-ILB-474&form=489&url=http%3A%2F%2Fwww.ciphercloud.com%2F&callback=jQuery110207256591254845262_1424970110347&_=1424970110348
There is a reason you need to add both pages: earlier, we specified /index.php/form/getForm at Mark multiple resources as translatable. If that page does not exist in the page list, Easyling will not be able to process the content.
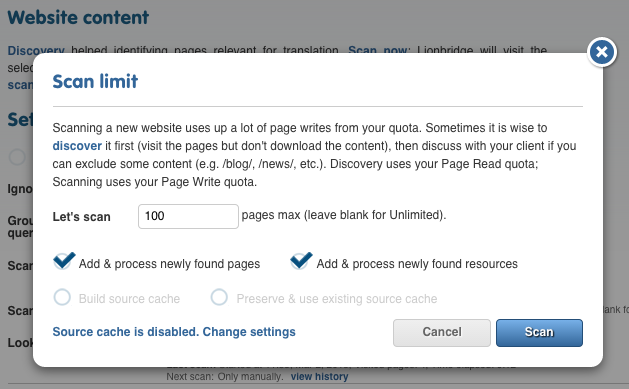
Once you are done with it, you can go to Content and click . You don't need to change anything in the dialog that pops up: just click . While Easyling is scanning the page, make sure to add a target language for the project.
After a minute or so the scan should be complete and you should get an e-mail with the analysis results. Now you can go back to the original project, go to General -> Link projects, paste the 8-character project code for the project you just created.
The last step is to translate the URL for the form data in the original project: for that you have to add "MktoForms2"."loadForm".0 url to JavaScript translation options (JSON / variables) in General -> Advanced Settings. Note the extra url parameter; it instructs the proxy to treat the value of the field as URL, and map/translate it automatically.